Cooking Guides & Masterclasses
Baking Tips for Beginners: 10 Rules for Better Results
By Sarah Mitchell · September 8, 2026 · 8 min read
Baking is more forgiving than its reputation once you understand a few principles. These are the rules we wish we'd known first.
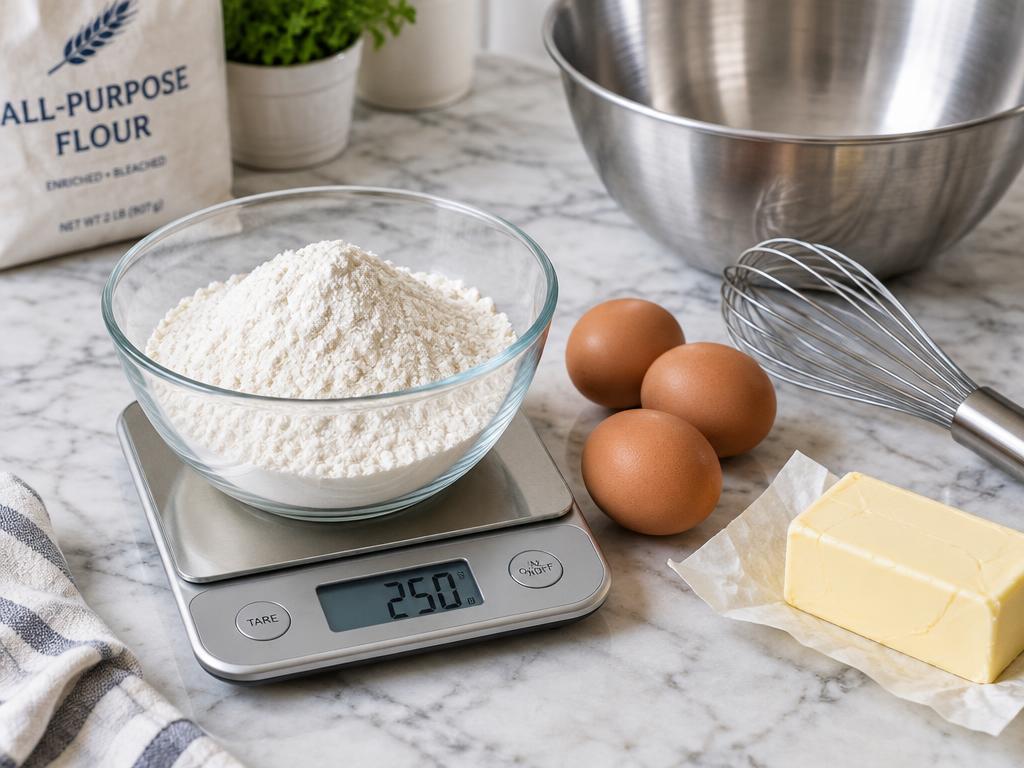
Weigh, don't scoop
A cup of flour can vary by 30% depending on how it's packed. A $20 scale is the best baking investment.
Room-temperature ingredients
Soft butter and room-temperature eggs trap air better, giving lighter cakes.
Know your oven
Many ovens run 15–25°F off. An inexpensive oven thermometer reveals the truth.
Don't overmix
Once flour meets liquid, gluten develops. Mix muffins and cakes just until combined.
Let it cool
Cakes and cookies keep setting as they cool; cutting too soon causes gummy centers.
Read the Formula as a Sequence of Jobs
Before setting out ingredients, read the entire method and identify what creates structure, what provides lift, and what must happen before the batter is mixed. Flour and eggs commonly help form structure, while fat and sugar influence tenderness, moisture, and spread. Baking powder, baking soda, trapped air, and steam can contribute lift in different combinations. An ingredient substitution may affect several jobs at once, which is why changing three ingredients simultaneously makes a disappointing result hard to diagnose.
Prepare the pan and organize ingredients before combining the wet and dry mixtures. Some batters begin producing gas as soon as the leavener meets moisture, so a search for parchment after mixing wastes useful time. Separate ingredients that are added at different stages rather than putting everything into one convenient bowl. If the method calls for sugar with butter and then flour later, that sequence is part of the formula, not merely a preference about cleanup.
For a first attempt, use the specified pan, ingredient types, and batch size. Keep a brief record of brand, pan material, oven setting, and actual baking time. If the result needs adjustment, change one variable in the next batch. A note such as dark metal pan browned the bottom before the middle set is actionable. A note saying the recipe failed gives you little guidance about whether the problem was heat, measurement, mixing, or an incompatible substitution.
Match the Mixing Method to the Structure
Creaming, whisking, and folding are different operations. Creaming workable butter with sugar creates air pockets that can expand during baking. Whisking eggs can build a foam, while folding aims to combine ingredients without losing too much trapped air. A recipe designed around melted butter will not behave exactly like one designed around creamed butter. Do not swap methods simply because a mixer is unavailable; select a formula that suits the tools you have.
For creaming, use butter that yields to a finger but still holds its shape, roughly 65–68°F (18–20°C) as a useful working range. Greasy, partly melted butter cannot hold air the same way. Beat at a moderate speed and scrape the bowl so dense butter is not left underneath a fluffy upper layer. Add eggs as directed, often one at a time, allowing each addition to disperse before the next. Slight curdling can occur, but extreme ingredient temperature differences make emulsions harder to maintain.
Once flour is added, follow the recipe's desired texture rather than applying a universal rule. A muffin batter often needs only gentle mixing with a few small lumps remaining; bread dough needs deliberate gluten development. Scrape the bottom of the bowl because dry pockets often hide there. If a cake has tunnels or a muffin becomes rubbery, review mixing intensity alongside flour quantity and leavener. Blaming only the oven can leave the actual structural problem unchanged in every later batch.
Understand Leaveners Before Making Substitutions
Baking soda needs available acid to generate carbon dioxide effectively in a batter. Baking powder contains both an alkaline component and acid salts; double-acting versions release some gas when moistened and more during heating. They are not interchangeable teaspoon for teaspoon. Buttermilk, yogurt, natural cocoa, and Dutch-process cocoa can change the chemical balance differently. If a recipe depends on one of these ingredients, choose a tested substitution rather than assuming a similar-looking ingredient performs the same role.
Too much leavener can cause a rapid rise followed by collapse, a coarse crumb, or an unpleasant chemical taste. More lift is not automatically better because the structure must set firmly enough to hold expanding gas. Measure small quantities with level measuring spoons and break up obvious lumps before mixing. A stray pocket of baking soda can create a bitter bite even when the total amount in the bowl was correct. Whisking the dry ingredients distributes these small but influential additions.
Store leaveners tightly closed in a dry cupboard and check the package date. As a rough activity check, a little baking powder should fizz in hot water, and baking soda should fizz when mixed with vinegar. These checks show that a reaction occurs; they do not prove that an old product will perform identically to a fresh one in a particular cake. Replace doubtful ingredients before an important bake rather than compensating with extra powder and creating another source of uncertainty.
Treat Pan Geometry as Part of the Recipe
A pan determines batter depth, the distance heat must travel, and the amount of exposed surface. The area of an 8-inch round pan is about 50 square inches, while a 9-inch round pan provides about 64 square inches. The same batter therefore sits noticeably shallower in the larger pan and generally finishes sooner. Matching only the stated diameter without considering depth or usable volume can still lead to overflow, especially with sloped sides or unusually shallow pans.
Light-colored metal pans are a dependable starting point for many cakes and cookies because they make browning easier to monitor. Dark pans absorb radiant heat readily and can darken edges faster; glass and ceramic behave differently again. Follow any pan-specific instructions in the recipe. If you must change materials, begin checking early and judge the center as well as the edges. Do not assume an automatic time adjustment will suit every batter or every oven.
Grease and line the pan as directed, keeping parchment away from heating elements and within the product's temperature rating. A parchment sling can make a cooled brownie slab easier to lift, but excess paper hanging over the rim can scorch. Avoid filling a pan to the top unless the recipe explicitly calls for it. If scaling a formula, calculate the ingredient weights first and select enough pans to preserve the intended batter depth rather than squeezing the entire larger batch into one vessel.
Use Doneness Clues That Fit the Bake
A timer tells you when to inspect, not when every baked item must be finished. Cake edges may pull slightly from the pan, the center may spring back gently, and a skewer may emerge with a few moist crumbs rather than liquid batter. Brownies can be intended to remain denser and moister, while a chocolate chip can make a cookie tester look wet. Interpret the evidence for the specific product rather than forcing every bake to produce a perfectly clean toothpick.
Check near the early end of the stated range, opening the door only as much as needed. Repeatedly opening it during the early rise can destabilize the oven environment. If the surface browns before the center is set, consider excessive top heat, a dark pan, or batter that is too deep. A loose foil shield may protect the top late in baking, provided it cannot contact a heating element. It will not repair a substantially wrong pan size or an incorrect formula.
Raw flour and uncooked eggs can carry harmful bacteria, so do not taste uncooked batter or dough. Color alone is not proof that an unfamiliar product has received an adequate bake; follow a reliable recipe's method and product-specific doneness guidance. Keep raw batter utensils away from ready-to-eat food and wash hands and surfaces afterward. If baking with children, provide a separate ready-to-eat treat instead of treating a quick lick of raw batter as a harmless part of the process.
Diagnose Crumb Problems One Variable at a Time
A dense cake may reflect weak aeration, inaccurate flour measurement, expired leavener, or loss of foam during folding. Start with observations: did the batter look unusually thick, did it rise and collapse, or did it barely rise at all? A collapsed center suggests a different investigation from a uniformly compact crumb. Record when the collapse occurred and whether the center was still liquid. Adding more baking powder without this context may exaggerate the very rise-and-collapse cycle you are trying to fix.
Dryness can come from overbaking, excess flour, an undersized egg, or storage that exposes cut surfaces. Test one likely cause first. If the edges are dark and the entire crumb is dry, shorten the next bake and verify oven behavior. If the product is pale, stiff, and crumbly, review the ingredient weights and substitutions. Replacing sugar with a much smaller amount of an intense sweetener changes more than sweetness because sugar also contributes bulk and affects moisture and structure.
A gummy layer can result from underbaking or cutting before the structure has stabilized, but excess liquid or poorly incorporated ingredients can also contribute. Let the bake cool as directed before judging it. For your next attempt, return to the original ingredient quantities and method rather than adding flour to compensate for several unrecorded changes. Treat a single unsuccessful batch as evidence to examine, not a reason to redesign the entire recipe. Controlled adjustments teach more than simultaneous guesses.
Store Each Bake According to Its Most Perishable Part
Wait until an unfilled cake or plain cookie is fully cool before sealing it for storage. Trapped warmth creates condensation, which softens crisp surfaces and can leave a sticky exterior. Separate crisp cookies from soft ones because moisture moves between them in a shared container. Wrap cut cake surfaces closely to limit drying. For freezing, portion first when practical, then wrap securely and label the package with its contents and date so you can thaw only what you need.
Fillings and toppings change storage requirements. A plain unfrosted cake is not equivalent to a cake filled with custard, whipped cream, or another perishable mixture. Refrigerate perishable baked goods promptly at 40°F (4°C) or below, following the recipe's storage guidance. Apply the two-hour room-temperature limit to perishable foods, shortened to one hour above 90°F (32°C). Do not assume that a high sugar content makes every homemade frosting shelf-stable; formulation and handling matter.
Thaw wrapped plain cakes at room temperature when appropriate to the recipe, keeping the wrapping in place to reduce drying. Thaw perishable filled products in the refrigerator instead. Freeze a small test portion if texture matters for a special occasion, since meringue toppings, delicate decorations, and crisp crusts may not return to their original state. A practical production plan might freeze an unfrosted layer ahead and add a fresh filling later, reducing last-minute work without promising that every finished dessert freezes equally well.
Key Takeaways
- Weigh, don't scoop: A cup of flour can vary by 30% depending on how it's packed.
- Room-temperature ingredients: Soft butter and room-temperature eggs trap air better, giving lighter cakes..
- Know your oven: Many ovens run 15–25°F off.
FAQ
Why did my cookies spread flat?
Butter was too warm, or flour was under-measured. Chill dough 30 minutes.
Sources
Found this helpful? Share it with a friend who loves to cook.
Tag us so we can see your creations.