Cooking Guides & Masterclasses
How to Cook Fluffy Rice: A Stovetop Guide That Explains the Fixes
By Flavor Feast Kitchen · October 17, 2026 · 8 min read
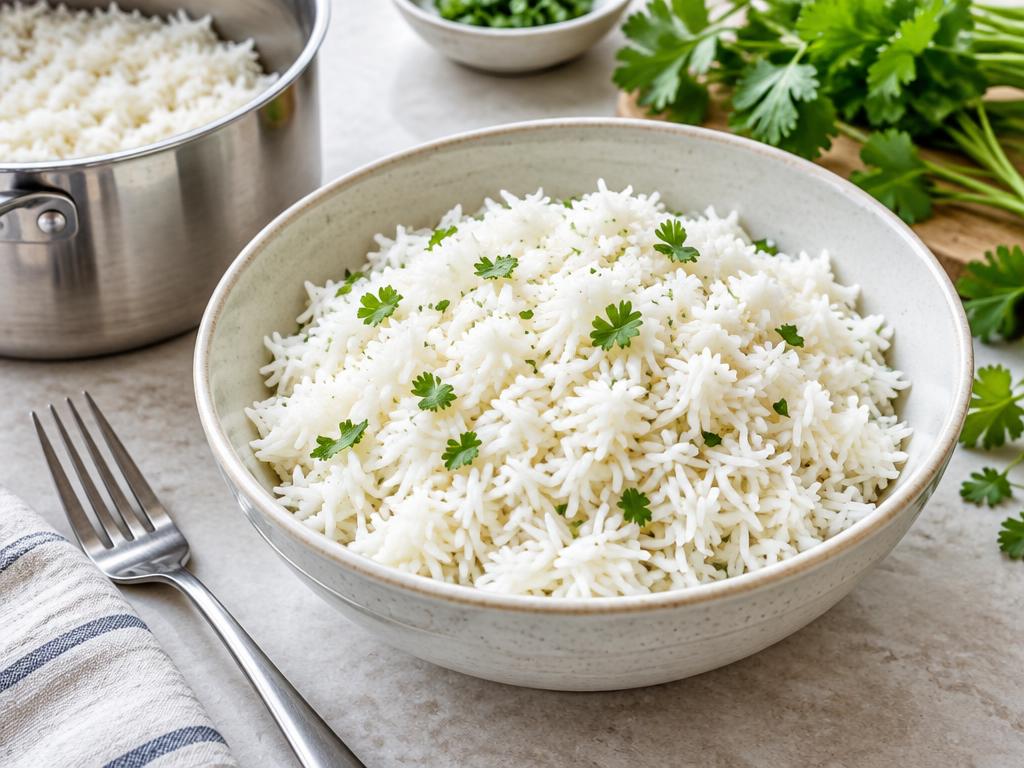
Rice can look finished at the surface while the bottom is wet and the middle of each grain is still firm. That makes it tempting to keep stirring, add a random splash of water, or turn the burner up. Often those moves create a second problem. This guide separates the decisions you make before cooking from the small adjustments that help afterward. The scope is plain long-grain white rice on the stovetop, not risotto, sticky rice, brown rice, or every rice-cooker setting. You will get a useful starting method, an explanation of what to look for, and a way to change one variable next time instead of guessing.
Quick Decisions and Fixes
| What you find | What to change |
|---|---|
| Dry pot, chalky center | Add a small splash of hot water, cover and cook gently; check lid fit next time. |
| Soft grains with excess liquid | Return briefly to gentle heat, then rest; more heat cannot rebuild mushy grains. |
| Burnt base | Transfer the unburned upper layer without scraping; lower the heat next batch. |
| Enriched rice label says not to rinse | Follow the label rather than automatically rinsing away surface enrichment. |
Start by deciding what kind of rice you actually have
Read the front and back of the packet before choosing a water ratio. Long-grain white rice, jasmine rice, basmati rice, parboiled rice and instant rice do not all behave the same way. Brown rice retains its bran layer and generally needs a different cooking schedule. A short-grain variety may naturally cling together; treating that as a failure would mean judging the rice against the wrong goal.
For a curry or a loose grain bowl, separate grains make sense. For a dish designed around sticky rice, they may not. Use the packet's instructions as your first reference, especially if it gives a method for the precise variety in your cupboard. The method below is a starting point for ordinary long-grain white rice. If the label conflicts with it, follow the label rather than combining two different recipes halfway through.
Choose a pot that suits the batch
A small batch in an enormous pot loses water differently from the same rice in a compact saucepan. A thin base can also develop a scorched patch before the rest of the rice is tender. Choose a saucepan with a reasonably substantial base, a snug lid and enough room for the rice to expand. You do not need expensive cookware; a suitable size and an even, controllable heat source matter more than a fancy finish.
Check the lid while the pan is cold. If it rocks or leaves an obvious gap, use another pot if possible. Steam escaping through a poor fit changes the effective water supply. Also make sure the burner is not dramatically wider than the pot. On a gas stove, flames climbing the sides do not help the rice cook gently. They make the handle hot and the low-heat stage harder to control.
Rinse thoughtfully, not automatically
For rice intended to be fluffy, rinsing can remove loose surface starch that would otherwise cloud the water and encourage clumping. Put the measured rice in a fine-mesh sieve and rinse with cool running water, moving it gently. Aim for water that is much less cloudy; it does not have to become perfectly invisible. Let the rice drain before measuring the cooking water so you are not adding an unpredictable puddle from the sieve.
There is a label exception worth taking seriously. Some enriched rice carries instructions not to rinse because nutrients have been added at the surface. Follow those directions. Rinsing is a texture choice, not a universal safety requirement, and this article does not recommend washing every kind of rice. If you soak basmati for a different recipe, remember that soaked grains already contain extra water; do not quietly add a soaking step to an unsoaked method and expect identical results.
Use one baseline instead of mixing ratios
For a practical long-grain starting batch, measure one cup of dry rice and one and a half cups of water, using the same cup for both. This is a cooking baseline, not a law. Published methods differ: America's Test Kitchen's long-grain method uses a two-to-three rice-to-water ratio, while Bon Appétit's pot-of-rice method uses less water. Those differences are a reason to keep the method, grain and pot together, not proof that one author is wrong.
Begin with the packet when it provides clear directions. If it does not, try this small batch and record the result. A compact, tight-lidded pot may need less correction than a wide pot with a leaky lid. Do not add extra water simply because the uncooked rice looks barely submerged; absorption cooking is about total water and controlled steam, not keeping a tall pool above the rice throughout cooking.
A covered stovetop method, step by step
Measure and rinse the rice if its label allows, then drain it. Put one cup of rice and one and a half cups of water in the chosen saucepan. Add a little salt if desired, keeping any salty sauce you plan to serve alongside it in mind. Bring the water to a simmer. Cover with the snug lid and lower the burner to the gentlest heat that maintains cooking rather than a vigorous boil.
For ordinary long-grain white rice, begin checking at the packet's stated time; around twenty minutes is a reasonable reference for many products, not a guaranteed finish time. Avoid repeated peeking and do not stir as it steams. When the water appears absorbed, move the covered pot off the active burner and leave it covered for about ten minutes. Then lift the lid away from your face and fluff gently with a fork. Taste a small cooled sample before deciding it needs correction.
What the covered rest actually changes
At the end of the active cooking stage, moisture and heat are not necessarily distributed evenly through the pot. A covered rest lets the grains settle and helps the texture become more consistent without more aggressive heat at the base. Skipping that stage because dinner is nearly ready can leave the surface looking fluffy while the lower layer feels damp. Pressing and stirring immediately can also break soft grains and turn a light texture into a compact mass.
Resting does not rescue every mistake. A pot with a large pool of water still needs a different adjustment, and severely undercooked grains may need more gentle cooking. Think of resting as part of the cooking method rather than a magical fix. Once the rice has rested, loosen it with a light lifting motion. Avoid repeatedly beating it with a spoon, especially if the grains are already tender.
If the rice is hard and the pot is dry
Taste a cooled grain. A firm, chalky middle with no remaining water suggests the rice needs more moisture and time, not a higher flame. Add a small splash of hot water around the rice, cover again and return to gentle heat. Check after a short interval. Keep adjustments small so the rescue does not become a soup. A tablespoon or two is a sensible first correction for a small batch, but the amount depends on how much rice is undercooked.
For the next batch, inspect the lid and heat before changing the water dramatically. Was steam visibly pouring out? Did the pot boil hard for most of the cooking time? Did you start the timer before the water reached a simmer? Those details can explain a dry result. Write down one change, such as a lower burner setting or a modest increase in water, and leave the other variables alone.
If the rice is wet, gummy or scorched
Wet rice and gummy rice are related but not identical. If tender grains sit above a little unabsorbed water, a brief return to gentle cooking may help, followed by a rest. If the grains have already burst and become mushy, further cooking cannot restore their original structure. Use that batch where a softer texture is acceptable, such as a soup added near serving, rather than promising yourself that a hotter burner will rebuild separate grains.
For a scorched base, take the pan off the heat. Transfer the unburned upper rice gently to another dish without scraping the bottom into it. If the burnt flavor has spread throughout, accept that the batch may not be pleasant to serve. Next time lower the heat, use a better-fitting burner and consider a heavier-bottomed pot. Do not pour cold water into a severely overheated emptying pan; let it cool safely before cleaning.
Scale portions without assuming the same evaporation
A larger batch does not automatically need a larger burner setting. Its center takes time to heat, and the bottom can still scorch if you try to hurry it. Use a pot that allows expansion, maintain the gentle covered stage, and follow a recipe written for that quantity when available. A simple proportional ratio can be a starting point, but evaporation also depends on pot width, lid fit and cooking time.
For meal planning, decide how the rice will be used before making a huge batch. A side portion, a generous grain bowl and a soup addition call for different amounts. Cook a manageable quantity while learning the method. If you are adjusting the water for your particular saucepan, a small trial gives you better information than a large family batch where several variables change at once. Save notes about rice type, quantity, water and the result.
Serve it well and handle leftovers safely
Fluff rice shortly before serving. Add chopped herbs, lemon zest or a small amount of butter after cooking if they suit the meal, rather than using extra seasoning to hide a texture problem. For bowls, keep wet sauces separate until serving so the grains do not sit submerged while you finish the other components. Rice does not have to be dry to be fluffy; the useful target is tender grains with no unwanted puddle and no chalky center.
Cooked rice needs careful time and temperature handling. Bacillus cereus can be associated with cooked rice that is held improperly, and reheating is not a way to erase an unsafe storage history. Serve promptly or divide leftovers into shallow containers and refrigerate promptly at 40°F (4°C) or below. Do not leave perishables out beyond two hours, or one hour above 90°F (32°C). Use general USDA leftover guidance of three to four refrigerated days, follow stricter local rice guidance where applicable, and reheat leftovers to 165°F (74°C) throughout. Discard rice with an unsafe holding history even if it smells normal.
Key Takeaways
- Start by deciding what kind of rice you actually have: Read the front and back of the packet before choosing a water ratio.
- Choose a pot that suits the batch: A small batch in an enormous pot loses water differently from the same rice in a compact saucepan.
- Rinse thoughtfully, not automatically: For rice intended to be fluffy, rinsing can remove loose surface starch that would otherwise cloud the water and encourage clumping.
FAQ
Does every rice need a 2:1 water ratio?
No. Variety, processing, pot and method affect the water requirement. Use the packet or a recipe for your exact rice rather than a universal ratio.
Can I stir rice while it cooks?
For this covered absorption method, leave it undisturbed during steaming and fluff after the rest. Risotto uses a different method.
Can I use stock instead of water?
Usually, for an appropriate savory dish. Check sodium and ingredient labels, and keep the same method rather than adding thick sauces to the cooking liquid.
Sources
Questions or a correction? Contact Flavor Feast Kitchen with the article title and what you noticed.