Kitchen Gear Buying Guides
Why Food Sticks to Stainless Steel—and What to Change
By Flavor Feast Kitchen · October 25, 2026 · 8 min read
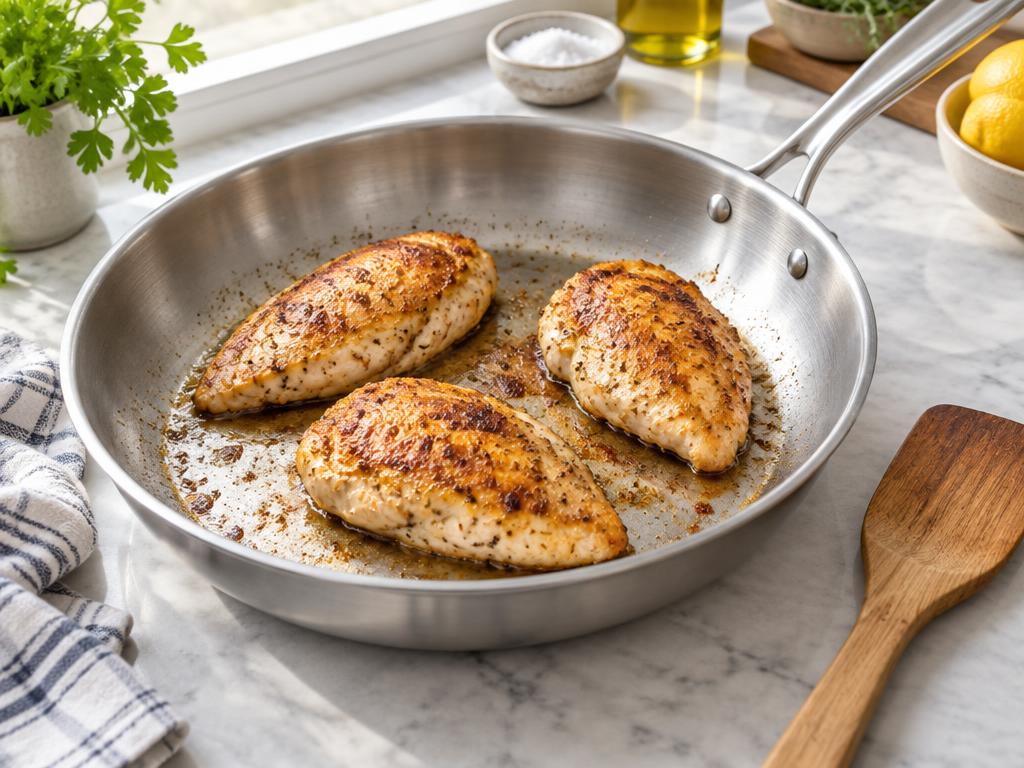
A stainless-steel pan can build a good brown crust and still feel frustrating when the food refuses to turn. The answer is not always more heat. Sometimes the pan is too hot, sometimes the food is wet, and sometimes you are trying to lift a protein before it has formed a useful crust. This guide covers bare, uncoated stainless-steel frying pans. It separates normal temporary adhesion and useful brown fond from scorching, explains a calm cooking sequence, and shows how to clean up without treating stainless like cast iron. The advice is general: your own pan's care instructions take precedence, especially for heating, utensils, handles and oven use.
Quick Decisions and Fixes
| Pan signal | Decision or fix |
|---|---|
| Pale food in pooled moisture | Dry ingredients and cook fewer pieces rather than crowding the base. |
| Oil smokes or fond turns black | Reduce heat; do not keep increasing the temperature to force release. |
| Protein resists turning while still pale | Allow more browning at controlled heat, then loosen gently with an appropriate utensil. |
| Stainless exterior, coated interior | Use the coating's care rules; this bare-stainless method does not apply. |
Check that the cooking surface is actually bare stainless
Some cookware has a stainless exterior and a nonstick interior. Others have special finishes or coatings that change the permitted utensils and cleaning methods. Look at the product description or manufacturer's instructions rather than deciding from the color alone. The techniques here are for an uncoated stainless cooking surface. Do not use strong preheating or abrasive cleaning on a coated pan because its outside happens to be silver.
Construction matters too. A thin single-layer pan and a heavier bonded pan do not react to the burner at the same speed. A pan with a bonded base may heat differently up its sides from one clad throughout. You do not have to memorize the engineering to cook dinner, but you should expect to learn your own pan's response. Start with moderate settings instead of copying a high burner position from someone else's stove.
Understand what sticking is telling you
Protein can initially adhere to metal as its surface heats. A formed crust and a suitable film of fat can make release easier, but neither turns stainless steel into a permanent nonstick surface. Brown bits left behind may be fond, which can flavor a sauce. Black, bitter deposits are a different matter. Treat the color and smell of the residue as information about the heat, not as proof that the pan needs a special seasoning ritual.
Wet food can make the problem harder to read. Water released into the pan may delay browning while the lower surface still clings. Crowding also reduces the available heat for each piece and traps moisture. Turning harder will not solve that situation. You may need to cook fewer pieces, dry the surface better, or give the first side more time. If the food is visibly scorching, however, waiting longer without reducing heat makes the problem worse.
Prepare the ingredients before preheating
Have the food, oil, utensils and any sauce liquid ready before the pan goes on the burner. Stainless can heat quickly, and an empty pan left waiting while you search for a spice jar can become much hotter than intended. Read the cooking sequence first, including the doneness check. A crust is a texture result, not a safe internal temperature measurement, so a meat thermometer may belong beside the spatula.
Pat the outside of suitable proteins dry with paper towels and discard them safely. Do not wash raw poultry; that can spread contamination around the sink and counter. Keep raw ingredients separate from ready-to-eat food, and wash hands and contacted utensils. For vegetables, dry washed pieces before frying. Cold food can still be cooked; there is no need to leave raw meat on the counter for a prolonged period in the hope that room temperature guarantees release.
Preheat moderately rather than chasing a trick
Put the appropriate pan on a suitably sized burner and preheat as the manufacturer recommends, often using moderate heat for general frying. Do not leave it empty unattended or use maximum heat as an automatic shortcut. The burner setting is not a temperature reading, and induction, gas and electric coils can behave very differently. Watch the pan and keep the next cooking step ready.
The popular water-bead test can indicate a hot surface, but it does not provide an exact cooking temperature or prove the pan is right for every food. Trying to produce a dramatic rolling bead may lead you to overheat a pan intended for a gentler egg or garlic dish. Water around hot oil can also splatter. You can skip that test entirely. Learn the pan through moderate preheating, the oil's behavior, and the food's actual browning response instead of making one visual trick a requirement.
Add an even film of oil and watch it
Add enough suitable oil to form a thin film over the cooking area, then tilt or swirl carefully. The exact amount depends on pan size and food; a teaspoon in a large skillet may leave broad dry patches. You do not need a deep pool for ordinary pan frying, but very lean ingredients usually need more help than fatty ones. Choose an oil appropriate for the temperature and any dietary restrictions.
Look for the oil to move readily and begin to shimmer rather than smoke continuously. If it is smoking strongly, reduce heat or remove the pan from the burner as appropriate. Avoid adding water to smoking oil. If the oil is badly overheated, allow everything to cool safely before disposing of it and restarting. There is no benefit in saving a teaspoon of scorched oil at the cost of bitter food and a smoky kitchen.
Place food with room to brown
Lay pieces gently into the pan so they do not overlap. Set them down away from you when that helps keep splashes from moving toward your body. A little sound is normal, but an explosive splatter is a warning to check moisture and heat. If the whole base is full of liquid after adding food, reduce the batch size next time. A pan packed edge to edge cannot behave like the same pan holding two pieces.
Leave the first side reasonably undisturbed while checking that the heat is not scorching it. Then test an edge with an appropriate spatula or tongs. If it resists and is still pale, give it a little more time rather than yanking. If the edge is darkening too quickly, lower the heat. Release is one clue, not an instruction to keep cooking forever. Delicate fish and eggs may still need careful loosening and may be easier in cookware suited to those tasks.
Turn without tearing, then check doneness
Use a utensil wide enough to support the food. Slide gently under an edge rather than pulling only on the top with tongs if the underside is attached. For bare stainless, many manufacturers permit metal utensils, but follow the instructions for your exact line and avoid unnecessary scraping. A suitable spatula can loosen a formed crust without gouging or shredding the food. Do not use a knife as a makeshift scraper.
Once turned, adjust the heat for the rest of cooking. A good first-side crust does not mean the center is finished. USDA minimum guidance is 165°F (74°C) for chicken, 145°F (63°C) for fish, and 145°F (63°C) followed by at least a three-minute rest for whole beef steaks. Ground meats have different requirements, so check the authority's chart for the food you are actually cooking. Do not use brown color, clear juices or easy release as a safety test.
Diagnose pale food and burnt food differently
Pale food swimming in moisture points toward a wet surface, overcrowding or insufficient usable heat. Dry the next batch, leave more room, and let the pan recover between batches. Simply turning the knob higher while the pan is overflowing with food can scorch exposed areas without solving the moisture underneath. If you must cook a large amount, batches can be a better plan than forcing the full quantity into one skillet.
Rapid dark spots, smoking oil and a black base point in the other direction: the pan is too hot for the task or has stayed at searing heat too long. Reduce the heat before adding delicate garlic, butter or sugary sauces. A fond that turns black while you finish a second batch may need to be cleared before continuing. There is no single heat setting that should remain unchanged from preheating through searing, sauce-making and final cooking.
Use fond for a sauce, not as a compulsory trophy
After removing cooked food, inspect the deposits. Golden to medium-brown fond can be useful; heavily blackened residue is likely to taste bitter. For suitable fond, reduce the heat and add a modest amount of recipe liquid carefully because it may steam and bubble. Stir with an appropriate utensil to loosen the brown bits. Water or stock is a simple choice; use the liquid your recipe calls for rather than improvising a dangerous flare with alcohol.
Let the sauce reduce to the desired consistency, then adjust seasoning. Stock may already contain substantial salt, so taste before adding more. If you use a plate or utensil that held raw meat, clean it before returning cooked food. When contaminated ingredients are involved, make sure the final food reaches the appropriate safe temperature. Fond is useful flavor, not a reason to bypass food safety or preserve every deposit regardless of how it tastes.
Clean food residue after the pan cools
Let the pan cool enough for the manufacturer's washing method. Pouring cold water into a very hot pan can cause thermal stress, and handling steaming liquid over a sink is an avoidable burn risk. For routine cleaning, use warm soapy water and a nonabrasive sponge. A short soak or a gentle simmer of water, if permitted, can loosen residue without immediately reaching for harsh scraping. Dry the pan to reduce water spots.
For stubborn discoloration, follow the maker's recommended cleaner and method. Some stainless manufacturers allow diluted vinegar for mineral deposits or certain stains; that does not mean every cleaner is suitable for every finish. Avoid chlorine-containing products or aggressive abrasives unless explicitly approved. Dishwasher permission can vary by line, and handwashing is often recommended to preserve appearance. Read the product guidance rather than applying a care rule from another metal or brand.
Know when a different tool is the sensible answer
Stainless steel is useful for browning, reducing sauces and cooking with fond. It does not have to be the best tool for every egg, pancake or fragile fish fillet in your kitchen. Choosing a suitable nonstick pan for a delicate task is not a failure to learn stainless. Likewise, repeatedly baking layers of oil into stainless is not required maintenance as it can be for cast iron. Keep the surface clean and follow its own care instructions.
Before buying another pan because one meal stuck, identify what happened: was the food wet, was the base crowded, did the oil smoke, and did you try to turn early? Change one variable in the next familiar dish. If the base is warped, unstable or damaged, stop and consult the manufacturer rather than compensating with increasingly high heat. A useful pan routine should give you control over browning and cleanup, not depend on smoke, force or a supposedly secret trick.
Key Takeaways
- Check that the cooking surface is actually bare stainless: Some cookware has a stainless exterior and a nonstick interior.
- Understand what sticking is telling you: Protein can initially adhere to metal as its surface heats.
- Prepare the ingredients before preheating: Have the food, oil, utensils and any sauce liquid ready before the pan goes on the burner.
FAQ
Does stainless steel need cast-iron-style seasoning?
No. Repeated oil-baking is not required care for ordinary uncoated stainless cookware. Follow your pan maker’s directions.
Is a rainbow stain automatically damage?
Not necessarily. Heat tint and mineral marks can be appearance issues, but use the manufacturer’s advice to distinguish stains from actual damage.
Why do eggs still stick even when meat releases?
Eggs are a different, delicate task. Heat, oil and technique help, but stainless is not a permanent nonstick surface; a suitable nonstick pan may be more convenient.
Sources
Questions or a correction? Contact Flavor Feast Kitchen with the article title and what you noticed.