Cooking Guides & Masterclasses
Knife Skills 101: The 5 Cuts Every Home Cook Needs
By Sarah Mitchell · September 30, 2026 · 7 min read
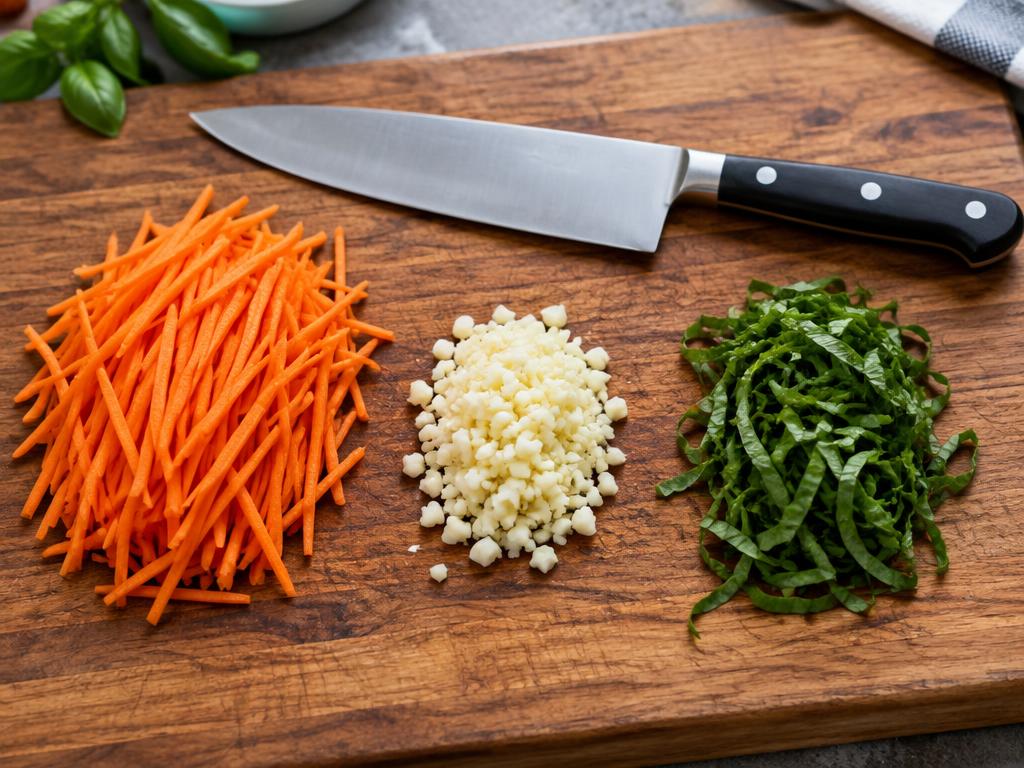
Good knife skills save more time than any gadget. These five cuts cover nearly every recipe you'll ever make.
Grip and stance
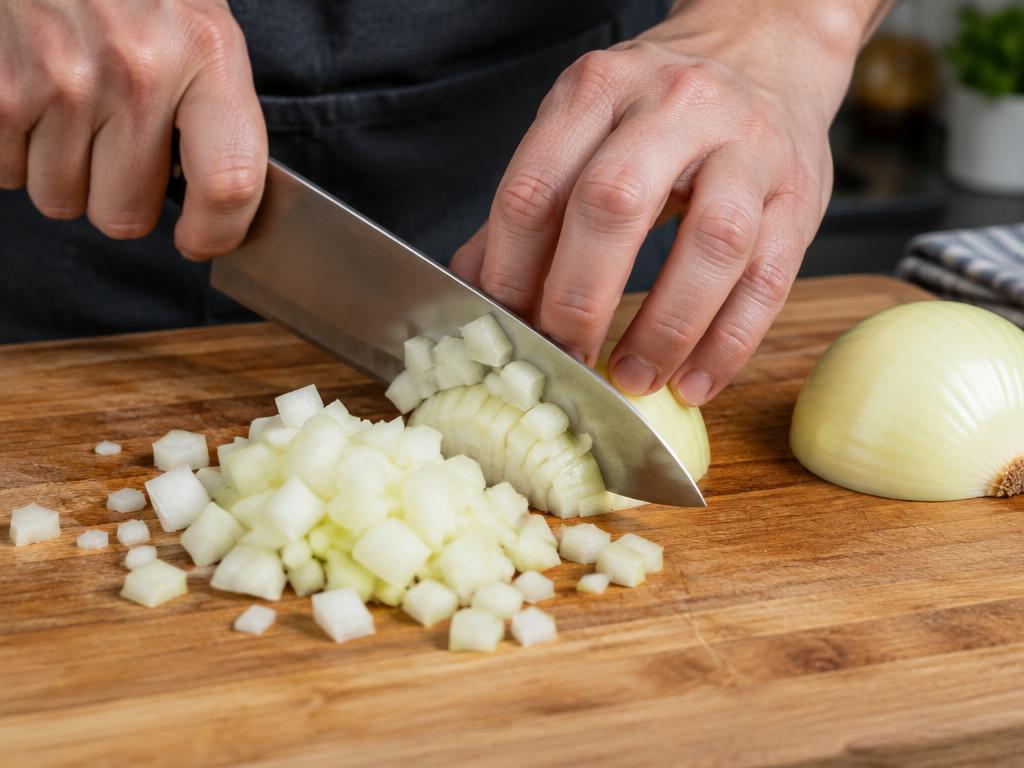
Pinch the blade just ahead of the handle and curl your guiding hand's fingertips under. Stand square to the board.
The rough chop
Irregular pieces for stocks and sauces where appearance doesn't matter.
Julienne
Thin matchsticks, about 1/8 inch, perfect for stir-fries and slaws.
Mince
Very fine pieces for garlic, ginger and herbs; rock the blade with your palm on the spine.
Chiffonade
Stack leafy herbs, roll tightly and slice into ribbons.
Match blade geometry to the ingredient
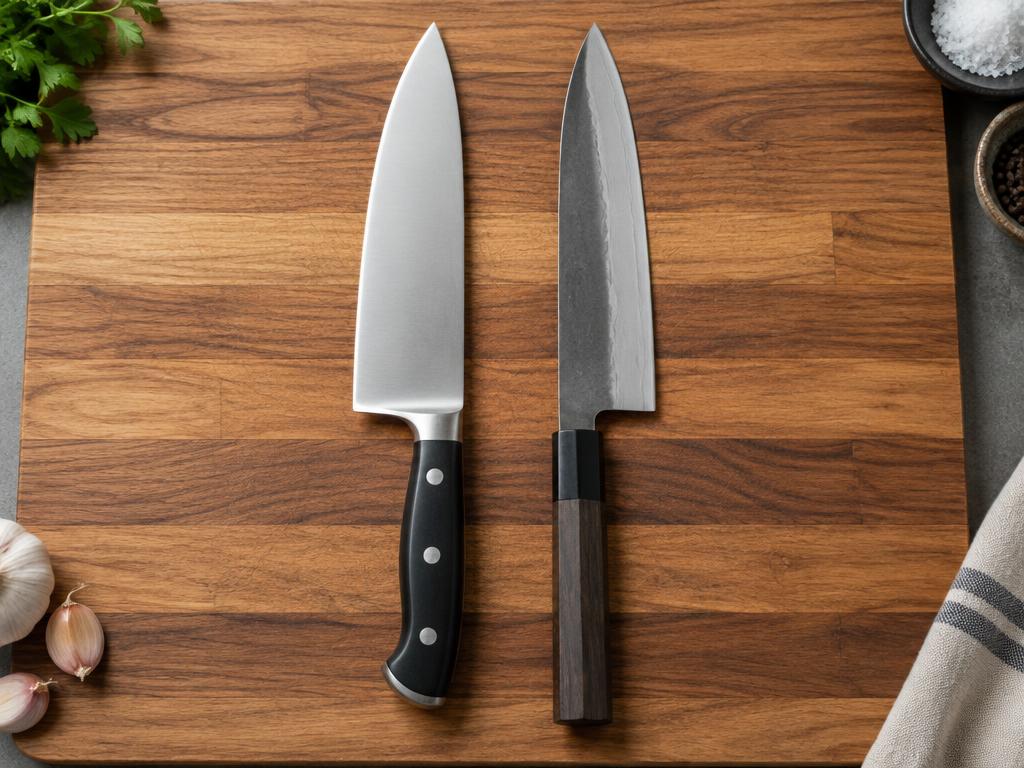
A useful knife kit is smaller than many beginners expect. A chef's knife handles most vegetables and boneless proteins, a paring knife suits small trimming jobs, and a serrated knife works well for crusty bread and some delicate-skinned foods. Choose the tool by the task rather than trying to prove one knife can do everything. A heavy chef's knife can crush a ripe peach, while a tiny paring knife forces awkward repeated strokes through a cabbage. For most board work, a blade around 8 inches long offers enough travel without feeling unwieldy, but comfort and control should determine your choice.
Pay attention to the blade's shape. A curved belly supports rocking strokes, while a flatter edge favors an up-and-down or forward slicing motion. Neither shape requires you to exaggerate movement. Let the edge travel through the food rather than driving it straight down with force. Do not use ordinary kitchen knives to split bones, open packaging, pry lids, or cut frozen blocks of food. Those jobs can chip the edge or cause a sudden slip. If an ingredient is too hard to cut comfortably, change the preparation: thaw it safely, use an appropriate specialized tool, or choose a different form of the ingredient.
Turn round vegetables into stable shapes
Before focusing on small cuts, learn to stop ingredients from rolling. Trim a thin slice from one side of a carrot or zucchini and place that flat surface on the board. For a large potato, cut it in half and work with the broad cut face down. A stable base reduces the effort required from your guiding hand, which should direct the food rather than clamp it desperately in place. Keep trimmed scraps for a suitable cooked dish instead of trying to balance a round vegetable merely to avoid losing a tiny amount of flesh.
For a carrot dice, start with a manageable segment about 2–3 inches (5–8 centimeters) long. Cut it into planks of similar thickness, lay the planks flat, and cut them into sticks. Turn the sticks crosswise and cut them into cubes. Make a small stack only when you can keep every layer steady; otherwise, work with one plank at a time. A tapered carrot will never produce identical pieces without substantial trimming, so prioritize a similar thickness over perfect geometry. If the vegetable starts sliding, stop and dry the board. Do not keep slicing while trying to rescue an unstable stack with fingertips close to the edge.
Learn three blade paths instead of forcing one motion
A forward slicing stroke works well for many vegetables: start with the edge touching the food, then move the blade forward and down so the edge travels through it. A draw cut reverses the direction, using a smooth pull that is helpful for cooked meat or delicate ingredients. A modest rocking stroke keeps the tip near the board while the heel rises and falls. Practice each slowly with a soft zucchini or cucumber. The goal is a clean slice with little pressure, not a dramatic movement that lifts the knife far above the board.
Listen as well as look. Loud, heavy impacts can signal unnecessary force, particularly when cutting soft food. A knife does not need to strike the board hard to finish a cut. If slices remain connected underneath, check that the full working portion of the edge reaches the board rather than simply increasing pressure. A warped board, damaged edge, or mismatched blade motion may be responsible. Stop if the knife catches unexpectedly. Reposition the ingredient and restart with a shorter stroke. Keep the blade's travel away from your body and never place your free hand in front of its path, even when the food seems soft enough to cut easily.
Use measurement to make cooking more predictable
Uniform thickness matters because heat takes longer to reach the center of a thick piece than a thin one. In a quick stir-fry, a pile containing paper-thin slices and chunky wedges produces soft edges alongside hard centers. Before cutting a whole batch, make three sample pieces and compare them side by side. Choose a thickness that suits the dish and use the first piece as a visual reference. You do not need a ruler beside every carrot, but measuring a few practice pieces once helps train your eye for future meals.
For roasting, pieces around 3/4 inch (2 centimeters) across are a useful starting point for many root vegetables, though density and the recipe still matter. For a fast sauté, thinner pieces usually make more sense. Sort obvious outliers before cooking: recut the largest pieces or cook them separately rather than waiting for them while the smaller ones overcook. Different vegetables do not become equally tender simply because they are cut to the same size. A carrot and a zucchini have different structures and water contents. Combine similar ingredients, stagger their addition to the pan, or adjust their sizes intentionally. Consistency is a tool for managing cooking, not a requirement to make everything look identical.
Diagnose dullness and maintain the edge safely
A knife that crushes tomato skin before entering the flesh or slides on an onion may need sharpening. Food condition matters too, so confirm the problem with more than one ingredient. Honing primarily straightens or refines an existing edge; sharpening removes material to create a new one. They are related but not interchangeable. Follow the knife manufacturer's guidance, especially for hard Japanese steels, very thin blades, or serrated edges. A coarse pull-through sharpener can remove more metal than necessary and may not suit the blade's geometry. Professional sharpening is a reasonable option if you are uncertain.
If using a honing rod, a beginner-friendly position is with its tip firmly planted on a nonslip surface and the rod held upright. Move the knife slowly at the appropriate angle, keeping fingers behind the guard and out of the blade path. Speed adds no benefit. After maintenance, wash and dry the blade before preparing food. Store knives in a block, on a securely mounted magnetic strip, or in fitted guards rather than loose in a drawer. Wash knives individually instead of leaving them submerged in a sink where someone could reach onto the edge. Dry the handle as well as the blade, and never try to catch a falling knife.
Prevent cross-contamination during a busy prep session
Plan the order of work before opening packages of raw meat. Wash hands with soap and water for at least 20 seconds, then prepare produce and ready-to-eat ingredients on clean equipment. Use a separate board for raw meat, poultry, or seafood when possible. If you must reuse a board, wash the board and knife thoroughly with hot, soapy water between tasks; merely wiping the blade on a towel does not remove contamination. Follow with an appropriate food-contact sanitizing method when needed, according to product directions. Replace boards with deep grooves that make effective cleaning difficult.
Keep the work area organized so clean ingredients never sit in raw meat juices. Bowls for cooked food and raw food should not trade roles without washing. Do not rinse raw poultry, because splashing can spread bacteria to nearby surfaces. Put perishable ingredients back into refrigeration promptly rather than leaving everything on the counter during a long practice session. The refrigerator should be at 40°F (4°C) or below. Refrigerate perishables within two hours, or within one hour when the surroundings exceed 90°F (32°C). Knife skill includes these pauses and resets: a fast cutter who contaminates the finished salad has not made meal preparation more efficient or safer.
Build a ten-minute drill that transfers to dinner
Set aside ten minutes with a carrot, a zucchini, and a few sturdy leafy greens, all washed and dried. Spend the first two minutes checking board stability and making flat bases. Use the next three minutes for planks and sticks, focusing on equal thickness. Then practice crosscutting a few sticks into dice. Finish with slow slices through the greens, using only a small stack that stays stable. Keep the pieces for a soup, sauté, or grain bowl. Using real meal ingredients makes the drill easier to repeat and reveals which cuts actually improve your cooking.
Evaluate control rather than counting cuts per minute. Were your shoulders relaxed? Did the blade finish each stroke without a hard impact? Did your guiding hand retreat steadily instead of jumping out of the way? Choose one question to improve in the next session. Take breaks when your hand tires, because fatigue encourages squeezing and rushed movements. If one ingredient feels difficult, simplify its shape before increasing speed. After several sessions, repeat the same drill and compare piece consistency, not just elapsed time. Speed develops naturally when setup, motion, and cleanup become familiar; deliberately rushing a blade never needs to be part of the practice.
Key Takeaways
- Grip and stance: Pinch the blade just ahead of the handle and curl your guiding hand's fingertips under.
- The rough chop: Irregular pieces for stocks and sauces where appearance doesn't matter..
- Julienne: Thin matchsticks, about 1/8 inch, perfect for stir-fries and slaws..
FAQ
How often should I sharpen?
Hone before each use; sharpen every few months depending on use.
Sources
Found this helpful? Share it with a friend who loves to cook.
Tag us so we can see your creations.